
What is a Poison Test?
A poison test is a process of checking the competence of quality inspectors. It is done by providing a small mixed lot of OK and defective parts for inspection within the defined takt time.
It is a periodic practical process of taking tests for final inspectors. Poison tests, also called poison cake tests, should be taken on all inspectors with visual defects.
Poison Test Work Instruction:
Below are the steps to conduct a poison test:
- First, mix the OK and Defective parts according to the Poison test sheet. (Take the OK part at least 50 numbers and the defective part 10%) Before mixing, mark the defective parts as not visible to the inspector.
- Then give the bin to the final inspector to check.
- Give the inspector a specific time (Takt time) to check the parts.
- Recheck the inspector-checked parts and keep the OK and defective parts separately.
- Check all the defective parts of the Final Inspector with your notebook.
- If the final inspector separates the parts with defect marking, then he is working correctly and is fully aware of his work.
- If the final inspector cannot separate the marked parts, he does not have full knowledge of his work. Stop inspection by that inspector until he qualifies in the poison test.
- Hold the previously checked parts by the inspector and recheck those parts by any qualified inspector.
- Then provide him training for all the defects of that part.
- Again, take his test to do his work correctly & completely.
Process-wise defect list:
1. Stamping:
Example: Burr, Dent, Scratch, Blank Short, Bending out, Wrinkles, Punching out, Rust etc.
More about the Stamping Process and stamping process defects in detail
2. Welding:
Example: Porosity, Blow holes, Bead offset, Under cut, Spatter etc
3. Machining:
Example: Unclean, Chamfer out, Burr, Dent, Scratch etc
| S.No | Process | Defects |
|---|---|---|
| 1 | Stamping | Burr, Dent, Scratch, Blank short, Wrinkles, Punching out, Rust |
| 2 | Welding | Porosity, Blow holes, Bead offset, Spatter, Undercut |
| 3 | Machining | Unclean, Chamfer out, Burr, Dent, Scratch |
Poison Test Benefits:
- Reduction in customer complaints.
- Reduction in house complaints.
- Improvement in inspector skill level.
- Improved customer satisfaction.
- Reduction in the Cost of poor quality as defects are captured in the house.
- Multi-skilled inspector.
- Improved confidence in inspection activity.
- The final inspector’s productivity improves.
Key requirements for the poison test:
- An actual poison test should be done & not a fake report.
- All defects should be covered in the poison test.
- The frequency of the poison test should be adequate. For the new inspector, it should be more. For skilled inspectors, we can reduce poison test frequency.
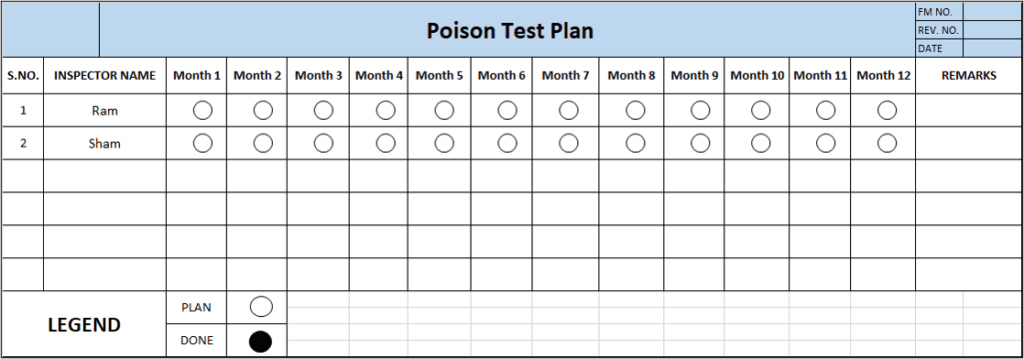
Poison Test Plan:
A poison test plan is a month-wise testing plan for inspectors. The testing frequency should be on a monthly basis. The poison test frequency should be in decreasing order. When an inspector joins a company, frequency should be weekly for the first 3 months, then reduced to monthly. If an inspector is fully skilled, then it can be quarterly.
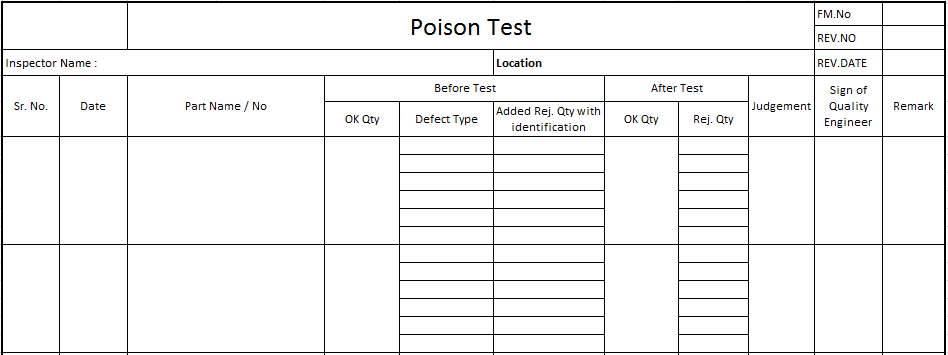
Poison Test Format:
How to fill in a poison test format?
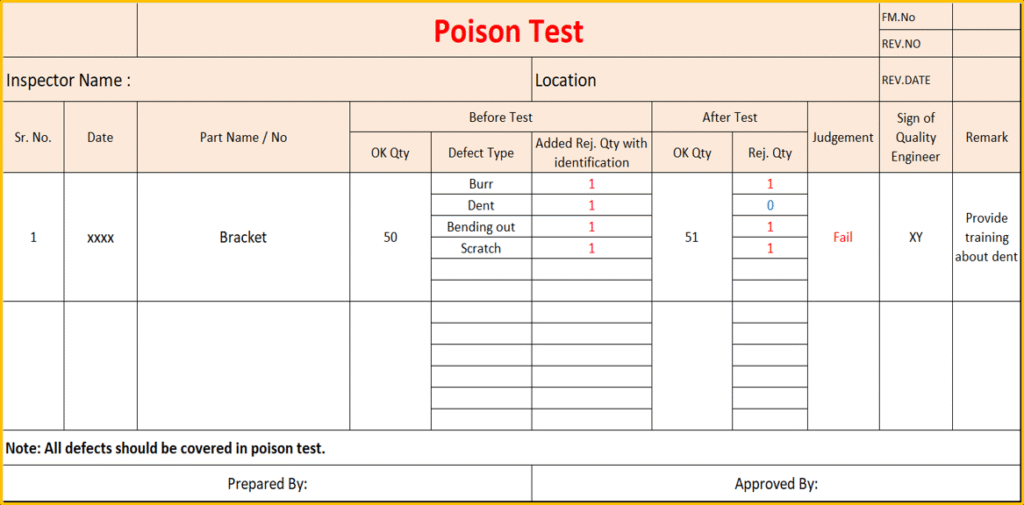
Write the name of the visual inspector and also define the location or shop of the final inspection. Then mention the date and part description. In the before test column, write the OK and Defect quantity with the defect type.
Then, after the test, write the result details in the OK and reject quantity column. If the result is OK, then mention OK in the judgment column. If the result is not OK, then provide training about the specific defect. Also take a poison test again. Do not get parts inspected by the inspector until he passes in poison test.
Poison Test Format (Filled) Example:
You may like to read about the Attribute MSA Study
Poison Test Format for inspectors in Excel:
Read about Operator Observance in manufacturing.
All in due time.
I don’t even know how I stopped up right here, however I believed this post was good. I do not recognize who you are however definitely you’re going to a famous blogger in case you are not already 😉 Cheers!