If you work in the automotive industry, manufacturing, quality assurance, or supplier development, you have likely heard about the 5 Core Tools. These tools are widely used to improve product quality, reduce defects, satisfy customer requirements, and meet IATF 16949 expectations.
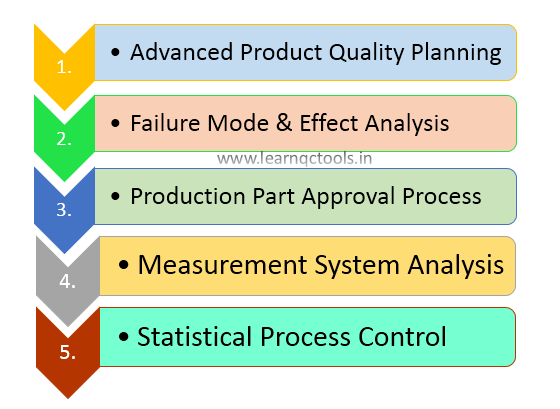
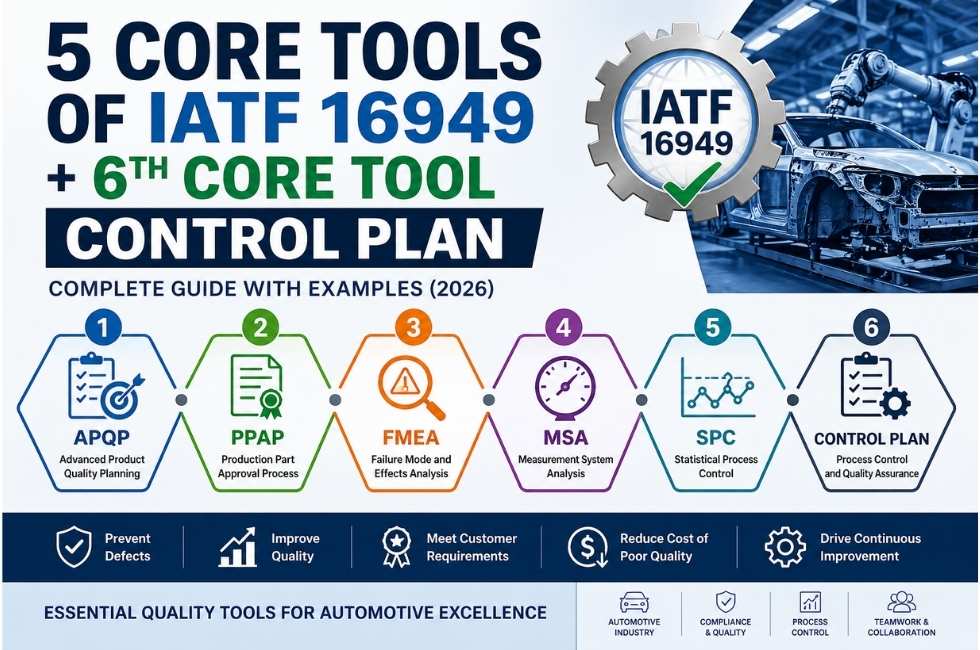
The 5 Core Tools of IATF 16949 are:
- APQP – Advanced Product Quality Planning
- FMEA – Failure Mode and Effects Analysis
- MSA – Measurement System Analysis
- SPC – Statistical Process Control
- PPAP – Production Part Approval Process
- What Are the 5 Core Tools?
- Why Are 5 Core Tools important in IATF 16949?
- List of 5 Core Tools
- 1. APQP – Advanced Product Quality Planning
- 2. PPAP – Production Part Approval Process
- 3. FMEA – Failure Mode and Effects Analysis
- 4. MSA – Measurement System Analysis
- 5. SPC – Statistical Process Control
- Which Core Tool Comes First?
- 5 Core Tools Example in Automotive Industry
- Difference Between APQP and PPAP
- Difference Between FMEA and Control Plan
- Are 5 Core Tools mandatory?
- Common mistakes in Core Tool implementation
- Best Practices for 5 Core Tools
- 5 Core Tools training need
- Who should learn 5 Core Tools?
- Frequently Asked Questions
- What are the 5 core tools?
- Who developed the 5 core tools?
- Are 5 core tools only for automotive industry?
- Which is the most important core tool?
- Can small companies use 5 core tools?
- Why Is Control Plan called the 6th Core Tool?
- Conclusion
- Need help with 5 Core Tools implementation?
These tools are especially important for automotive suppliers, OEM vendors, and manufacturing companies that want to build robust systems and reduce quality issues.
In this complete guide, you will learn what the 5 core tools are, why they are important, how they are used, and real examples from industry.
What Are the 5 Core Tools?

The 5 Core Tools are structured quality methods developed mainly by the Automotive Industry Action Group to standardize quality planning and control in the automotive sector.
They help companies:
- Prevent defects before production
- Improve process capability
- Meet customer-specific requirements
- Reduce rejections and warranty claims
- Improve supplier quality systems
- Support IATF 16949 compliance
These tools are commonly used in automotive manufacturing, sheet metal parts, machining, plastic molding, electronics, forging, casting, and assemblies.
Why Are 5 Core Tools important in IATF 16949?
International Automotive Task Force 16949 is a quality management standard for automotive organizations. While it does not always explicitly say “use all 5 core tools,” these tools are strongly expected and integrated into automotive customer requirements.
Benefits include:
- Better launch planning
- Lower customer complaints
- Strong PPAP approvals
- Improved measurement accuracy
- Controlled manufacturing processes
- Lower COPQ (Cost of Poor Quality)
List of 5 Core Tools
| Tool | Full Form | Main Purpose |
|---|---|---|
| APQP | Advanced Product Quality Planning | Product launch planning |
| PPAP | Production Part Approval Process | Customer approval before mass production |
| FMEA | Failure Mode and Effects Analysis | Risk prevention |
| MSA | Measurement System Analysis | Measurement reliability |
| SPC | Statistical Process Control | Process control using data |
1. APQP – Advanced Product Quality Planning
APQP is a structured method used to ensure products are planned properly before production starts.
It includes:
- Customer requirements review
- Feasibility study
- Design review
- Process planning
- Tooling readiness
- Trial production
- Launch readiness
APQP Phases
- Plan and Define Program
- Product Design and Development
- Process Design and Development
- Product and Process Validation
- Feedback and Corrective Action
Example of APQP
A company receives a new order for an automotive bracket. APQP helps plan tooling, gauges, packaging, PFMEA, control plan, and trial production before SOP.
2. PPAP – Production Part Approval Process
PPAP is used to prove that a supplier can consistently produce parts meeting customer requirements.
Before mass production, suppliers submit PPAP documents for approval.
Typical PPAP elements include:
- Design records
- Process flow chart (PFD)
- PFMEA
- Control plan
- MSA studies
- SPC capability studies
- Dimensional results
- PSW (Part Submission Warrant)
Example of PPAP
A Tier-2 supplier making washers submits Level 3 PPAP to customer before production dispatch.
Why PPAP Matters
- Prevents wrong launches
- Confirms readiness
- Builds customer confidence
3. FMEA – Failure Mode and Effects Analysis
FMEA is a preventive risk analysis tool used to identify what can go wrong and reduce failures before they happen.
Types:
- DFMEA – Design FMEA
- PFMEA – Process FMEA
It evaluates:
- Failure mode
- Effect of failure
- Cause of failure
- Current controls
- Risk priority/action priority
Example of PFMEA
Process: Drilling operation
Failure Mode: Hole diameter oversize
Cause: Tool wear
Action: Tool life monitoring + first piece approval
Benefits of FMEA
- Reduces defects
- Prevents customer complaints
- Improves process robustness
4. MSA – Measurement System Analysis
MSA ensures that your measuring instruments and inspection systems are reliable.
If measurement is wrong, decisions will also be wrong.
MSA commonly includes:
- Gage R&R
- Bias
- Linearity
- Stability
- Attribute agreement analysis
Example
If two inspectors measure same shaft and get different readings, MSA helps determine whether gauge or method is causing variation.
Why MSA is critical
- Reliable inspection decisions
- Fewer false rejections
- Better process data
5. SPC – Statistical Process Control
SPC uses charts and data analysis to control manufacturing processes and detect variation early.
Common tools:
- X-bar R chart
- P chart
- Cp / Cpk studies
- Histogram Trend analysis
Example
If hole diameter starts drifting upward over time, control chart alerts the team before rejection happens.
Benefits of SPC
- Lower scrap
- Stable process
- Better capability
Which Core Tool Comes First?
Usually the sequence is:
- APQP starts planning
- FMEA identifies risks
- MSA validates gauges
- SPC controls process
- PPAP proves readiness to customer
In reality, these tools are interconnected and often run together.
5 Core Tools Example in Automotive Industry
A company receives order for a seat bracket.
How tools are used:
- APQP → launch planning
- PFMEA → welding distortion and other failure risk identified
- MSA → fixture, gauge, instruments validated
- SPC → hole pitch (CTQ) monitored
- PPAP → submission sent to OEM
This integrated approach reduces failures and improves approval speed.
Difference Between APQP and PPAP
| APQP | PPAP |
|---|---|
| Planning tool | Approval process |
| Used during development | Used before production approval |
| Covers full launch stages | Final evidence submission |
Difference Between FMEA and Control Plan
| FMEA | Control Plan |
|---|---|
| Identifies risks | Controls process |
| Preventive analysis | Operational monitoring |
Are 5 Core Tools mandatory?
For automotive suppliers, yes in practical terms. Even when not written as “mandatory,” customers and auditors expect implementation where applicable.
Especially common for:
- OEM suppliers
- Tier-1 suppliers
- Tier-2 suppliers
- Export automotive manufacturers
Common mistakes in Core Tool implementation
Avoid these issues:
- Copy-paste FMEA
- Old control plans not updated
- Fake capability data
- MSA not linked to actual gauges
- PPAP without real readiness
- APQP only on paper
Best Practices for 5 Core Tools
- Use cross-functional teams (CFT)
- Update documents after changes (Revision)
- Link PFMEA to control plan
- Use real production data
- Train operators and engineers
- Review during internal audits (Process audit)
5 Core Tools training need
Many companies search for 5 core tools training because staff need practical understanding.
Training should cover:
- APQP (Advanced Product Quality Planning)
- PPAP submission levels
- PFMEA workshop
- Gage R&R calculation
- Control charts basics
This is useful for QA engineers, production engineers, suppliers, and new team members.
Who should learn 5 Core Tools?
- Quality Engineers
- Production Engineers
- Supplier Quality Engineers
- New Product Development Teams
- Plant Heads
- Internal Auditors
- Consultants
Frequently Asked Questions
What are the 5 core tools?
APQP, PPAP, FMEA, MSA, and SPC.
Who developed the 5 core tools?
They were popularized by Automotive Industry Action Group (AIAG) for automotive quality systems.
Are 5 core tools only for automotive industry?
No. They are most common in automotive, but useful in many manufacturing sectors.
Which is the most important core tool?
All are important, but PFMEA and Control Plan often give fast operational benefits.
Can small companies use 5 core tools?
Yes. Use simplified versions based on process complexity.
18 Elements of PPAP:
- Design Record / Drawing
- Authorized Engineering Change Documents
- Design Failure Mode & Effect Analysis
- Process Flow Diagram
- Process Failure Mode & Effect Analysis
- Control Plan
- Measurement System Analysis
- Dimensional results
- Records of material / Performance tests
- Material test report
- Initial Process Studies (SPC)
- Qualified Laboratory documents
- Appearance approval report
- Sample production parts
- Master sample
- Checking aids
- Customer-specific requirements
- Part Submission Warrant ( PSW)
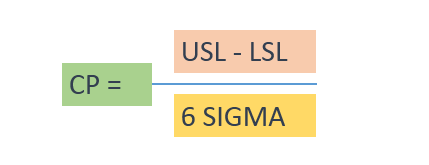
Process Capability:
It is the measurement of the inherent variation of the process when it is in stable condition with respect to process specification.
Cp = (USL – LSL) / 6 sigma

Process Capability Index:
The process capability index is the measurement of process capability. It defines how close a process is able to produce the product to the specifications.
Cpk = Min ( (USL – Mean)/3 Sigma & (Mean – LSL)/3 Sigma)

Although traditionally the 5 Core Tools are APQP, PPAP, FMEA, MSA, and SPC, many automotive companies now also refer to Control Plan as the 6th Core Tool because of its practical importance in daily production control.
A Control Plan is a documented plan that defines how product and process characteristics will be controlled during manufacturing to ensure consistent quality output.
It is one of the most important working documents on the shop floor.
Why Is Control Plan called the 6th Core Tool?
Many professionals call it the 6th core tool because:
- It converts PFMEA risks into controls
- It is mandatory in most PPAP submissions
- Auditors check it frequently
- Operators use it daily
- It directly impacts product quality
Conclusion
The 5 Core Tools of IATF 16949 are essential methods for building strong quality systems and successful product launches. Companies using these tools properly reduce defects, improve customer confidence, and grow faster in the automotive supply chain.
If you are a supplier or manufacturer, mastering APQP, PPAP, FMEA, MSA, and SPC is one of the smartest investments for long-term success.
Need help with 5 Core Tools implementation?
If you need practical support for:
- PPAP submissions
- PFMEA preparation
- MSA studies
- Internal audits
- IATF 16949 systems
- VSA
QC Tools Solutions can support your organization with practical implementation and training.


Amazing! Its in fact amazing post, I have got much clear idea about
from this post.